RMS Cloud
How to authenticate the integration
We'll use a test app, Acme AI, to show how an end-user can authenticate the integration between RMS Cloud and Acme AI.
Go to Settings > Integrations section within Acme AI app.
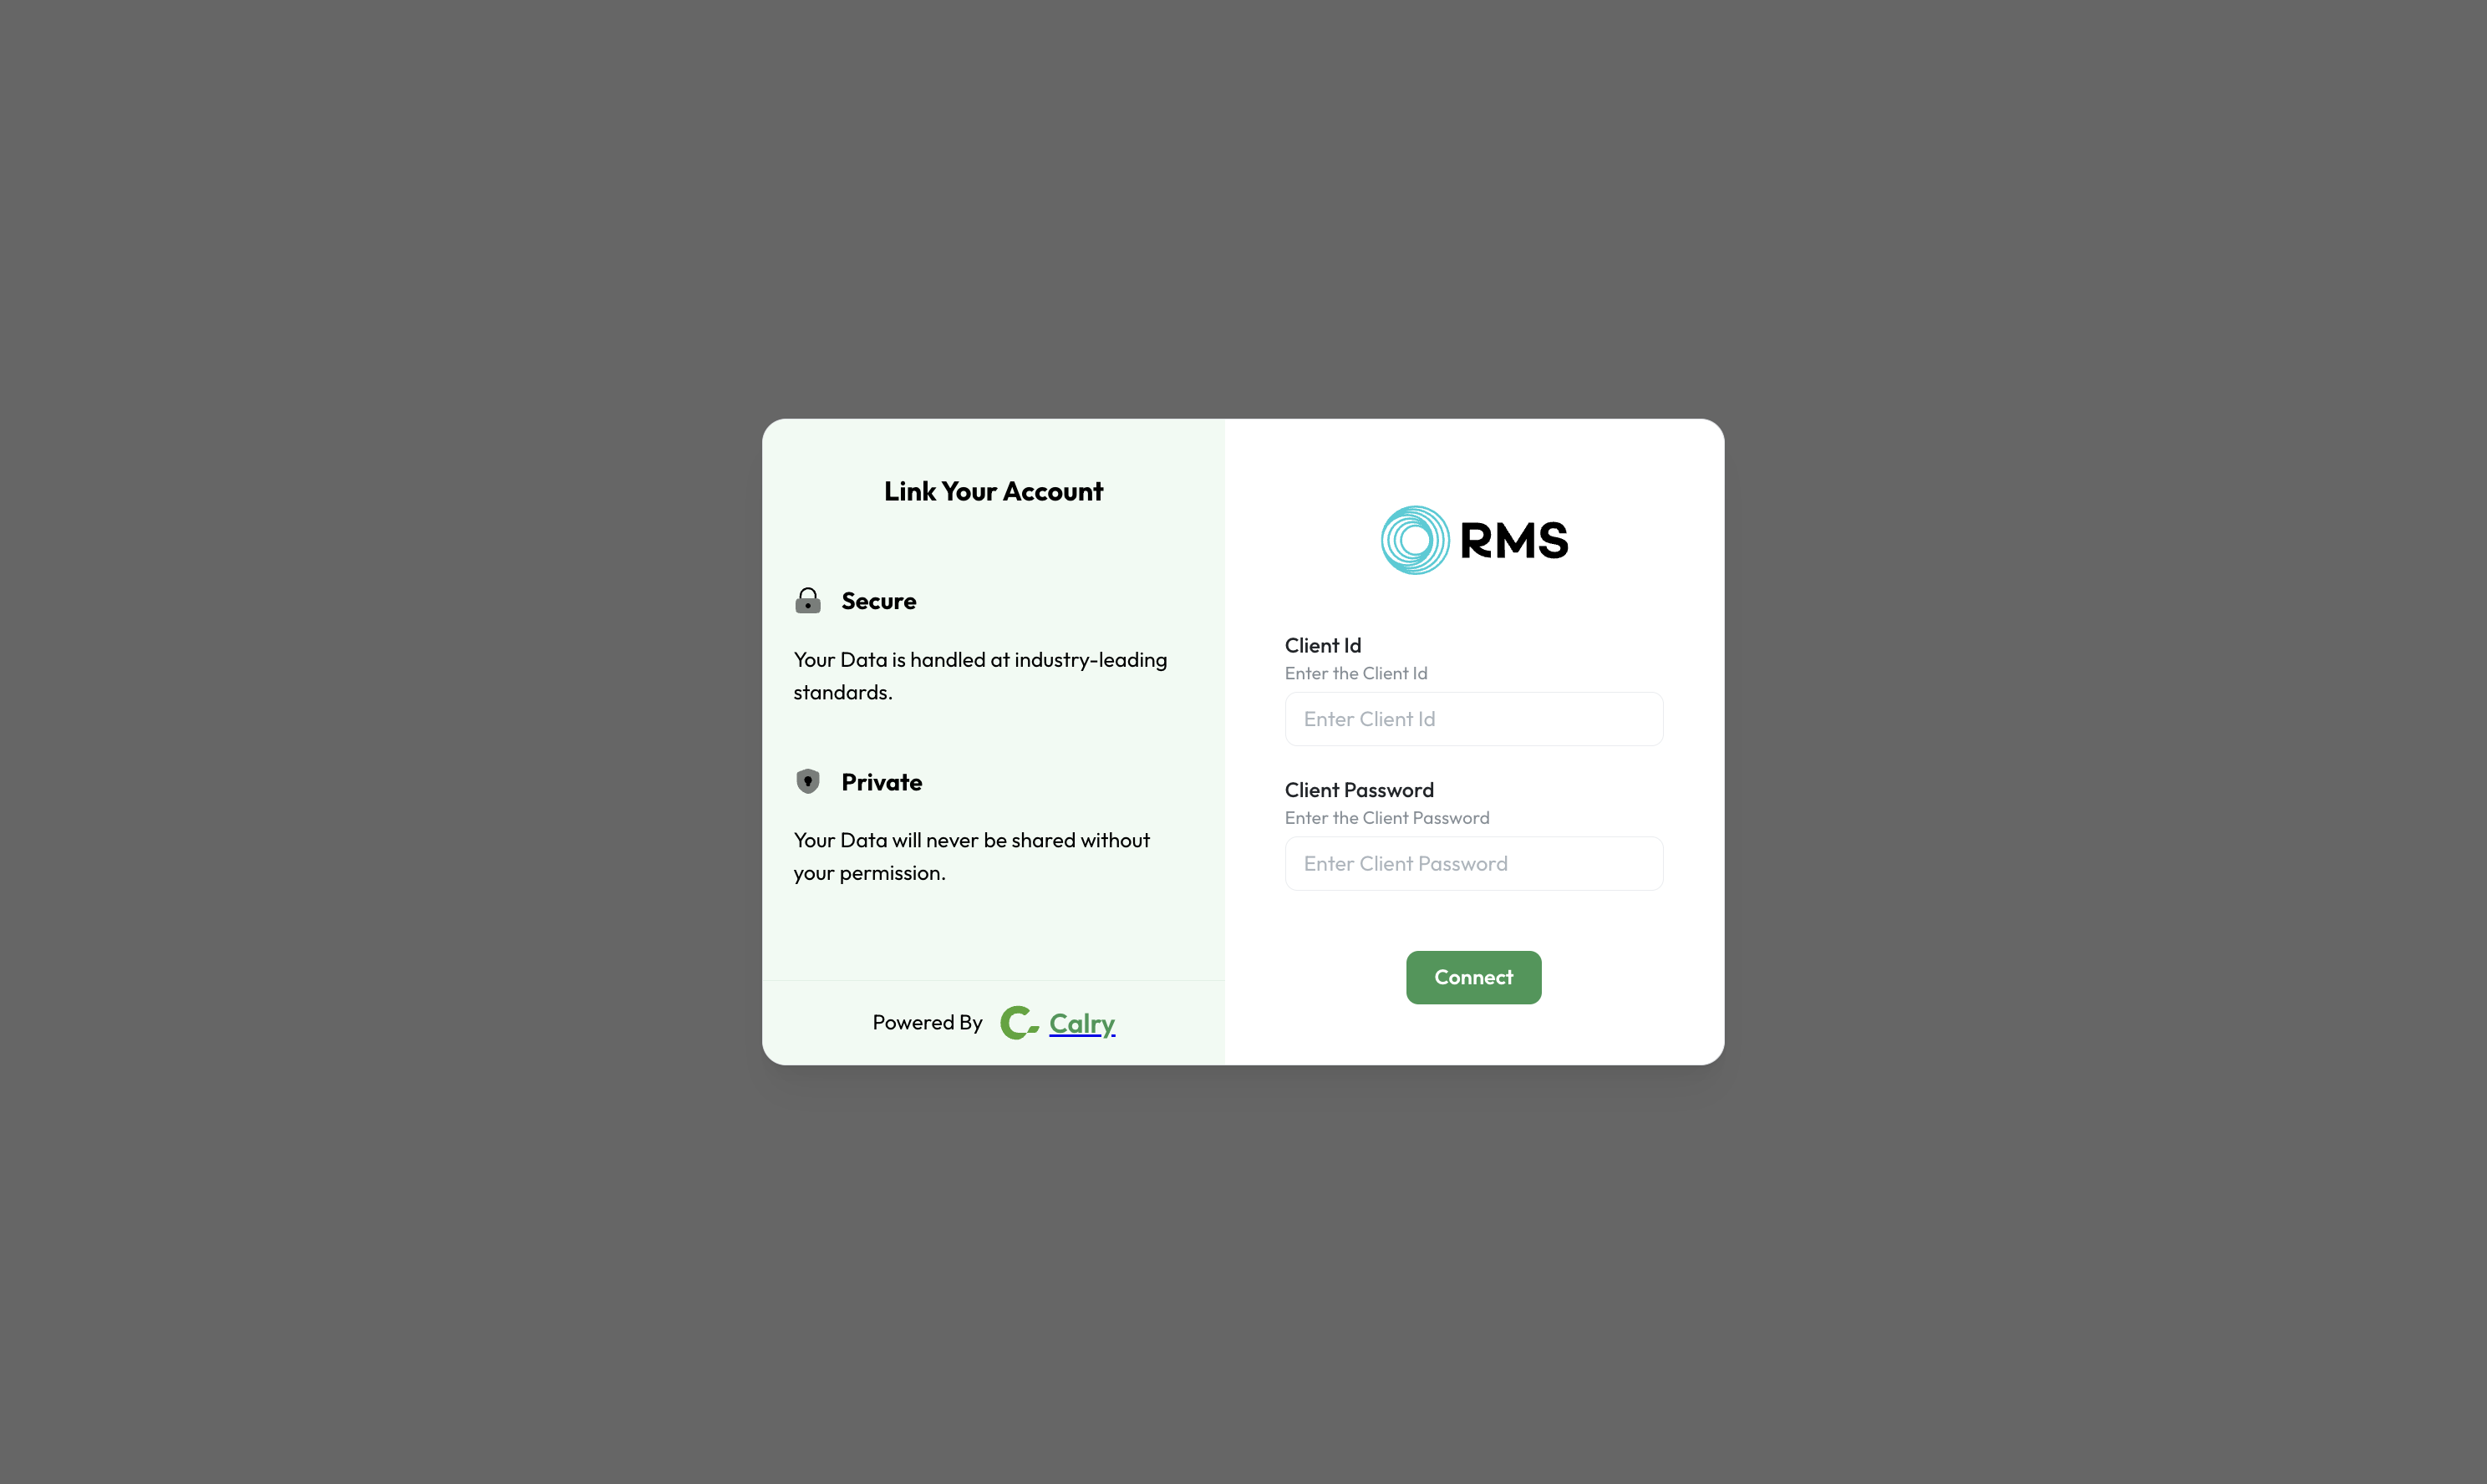
Among the list of Integrations, click on RMS Cloud's logo and you will be redirected to the Authentication Screen as shown below.
Now switch over to your RMS Cloud Account in a new tab. Click on Profile on the left top bar as shown in below image. Copy
Client IDto your clipboard.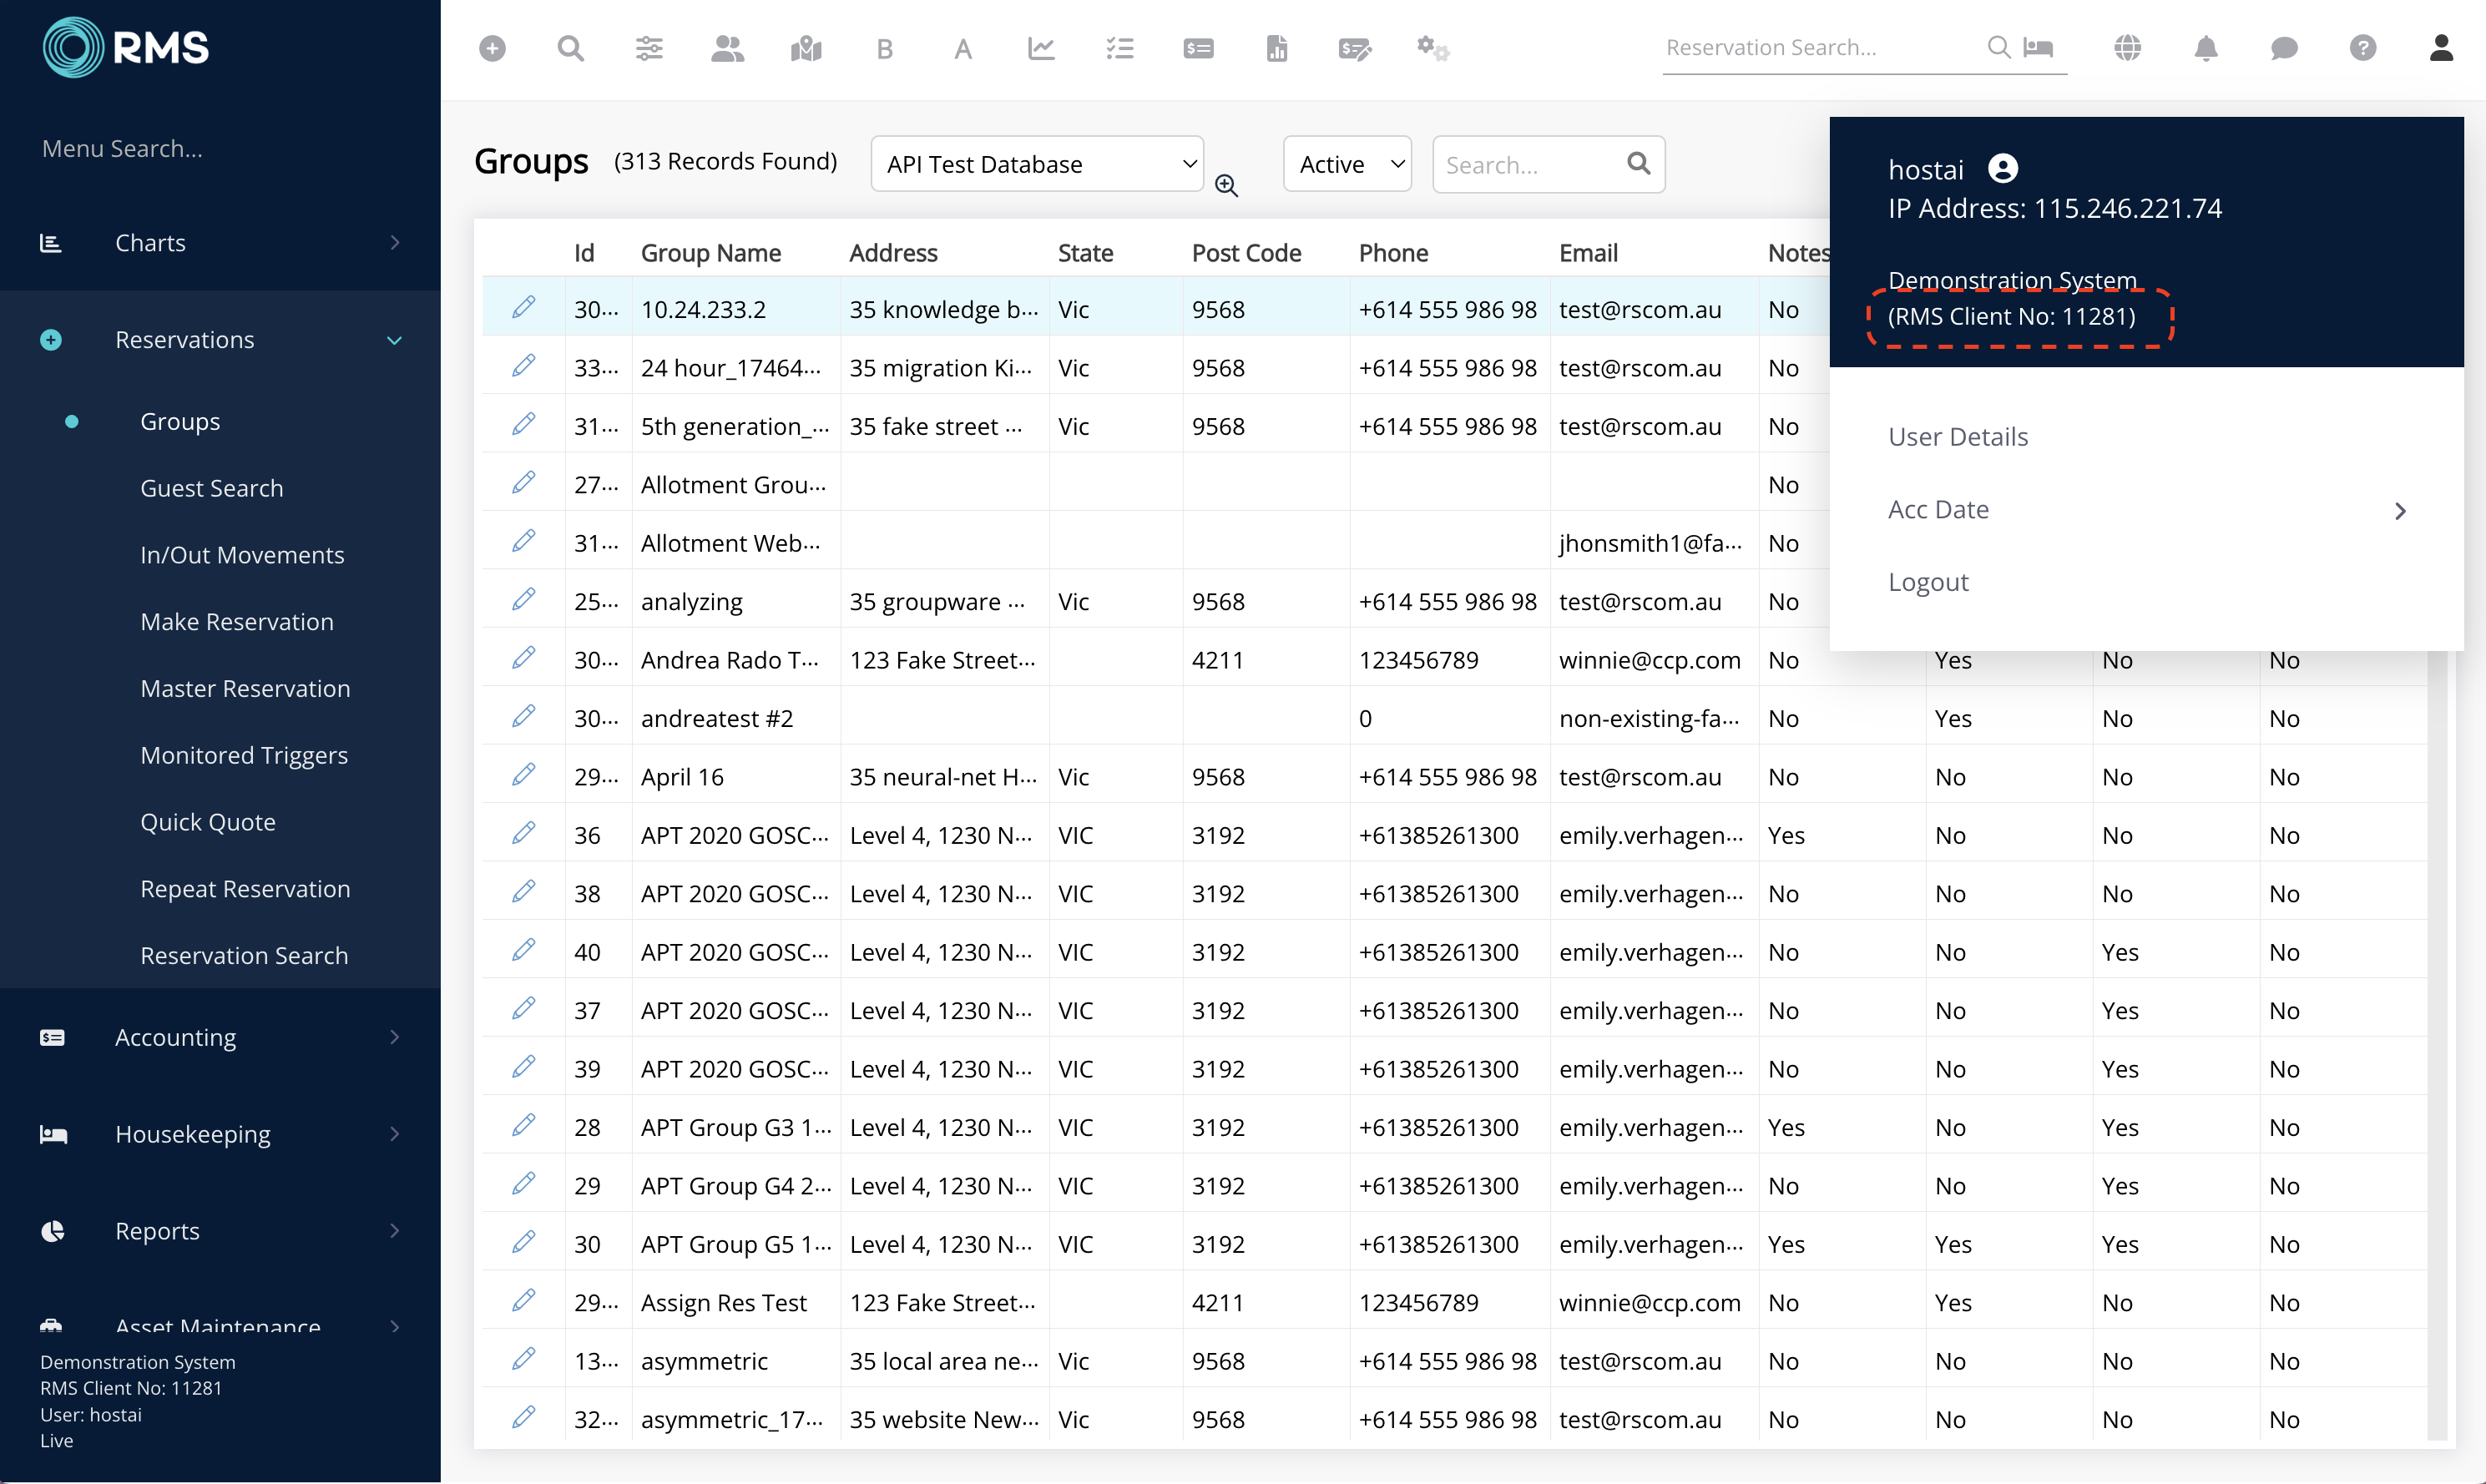
Also, copy the
Client Passwordyou use to login to RMS Cloud.Paste the
Client IDandClient Passwordback on your Authentication Screen (from Point 2) and Click on ‘Connect’. You will see a message box that shows you’ve successfully authenticated the integration. You will be redirected back to Acme app now.
How to configure Authentication
This setup is required only once by the company integrating with Calry APIs, as part of the RMS Certification process.
Reach out to
apisupport@rmscloud.comfor gettingagent_idandagent_password.Open Calry web app and Go to Settings > Integrations > Click on 'Configure' in RMS Cloud.
Enter the
agent_idandagent_passwordexactly as shown in the below image and click on Save.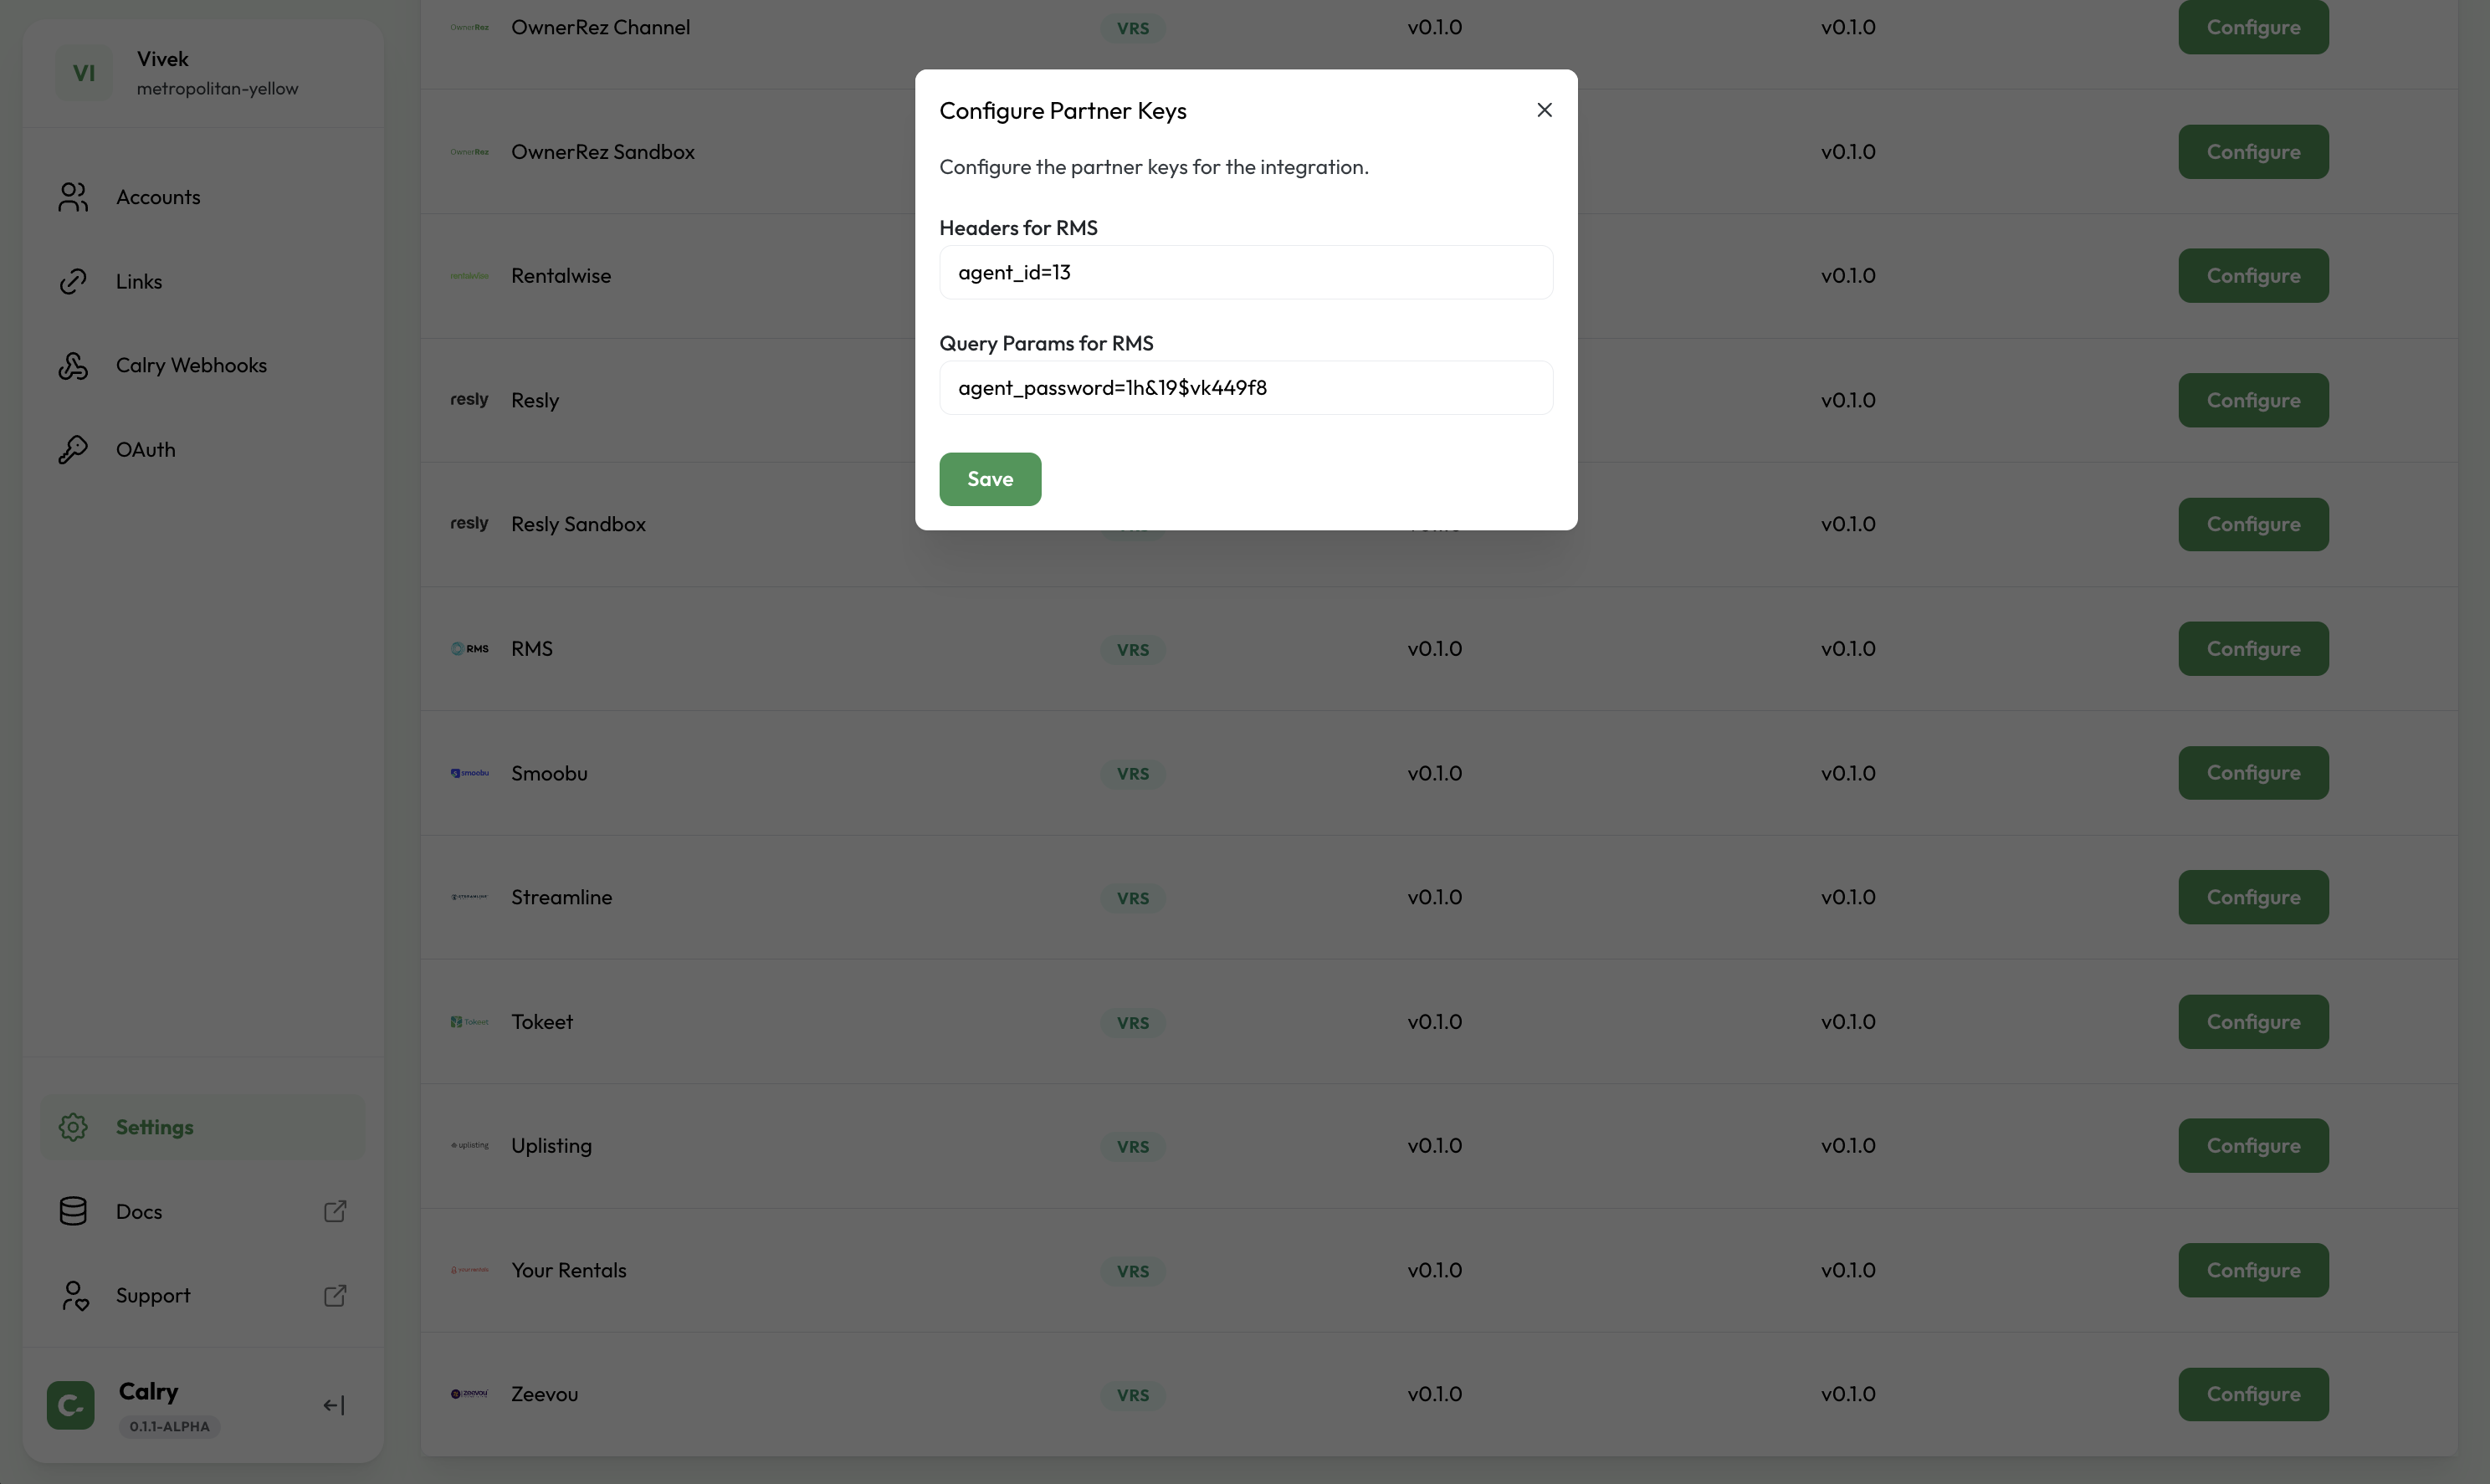
If you have any questions or need help, don't hesitate to reach out at mail@calry.app.